, Plain White")
, Plain White - Side View")


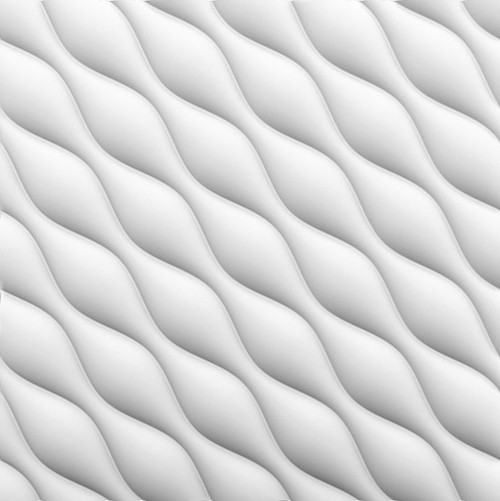
Dessert 2ft. x 2ft. Seamless Glue-up Wall Panel (Package of 12 Tiles), Plain White
EPS 3D Wall Panels - Installation Instructions
You will need the following to install the panels correctly:
- A wallpaper cutter
- A measure tape
- A level
- A pencil
- A primer
- An adhesive for polystyrene foam
- An acrylic filler (optional)
- Acrylic or latex paint (optional)
- 1 mm (spax) decking spacers (optional)
Remove the panels from the packaging and wait for at least 4 (four) hours to allow the product to adapt to ambient temperature. Before installing the panels, place them on a flat surface to arrange them in a pattern and to inspect them for mechanical damage that may have been caused during transport. Once you install the panels on a wall or ceiling, you will not be entitled to make any warranty claims.
Step 1. Prepare the surface
The panels should be installed on a clean and dry surface free form loose dirt. Before installation, any holes in the surface (wall or ceiling) should be filled with a patching compound. If the surface is covered with wood, plastic or varnish, sand the surface matt with fine grit sandpaper.
Now prime the surface using a commercial primer.
Step 2. Arrange the panels
Before installing the panels, plan how to arrange them on the surface, paying attention to the direction of the pattern.
A rough drawing of the arrangement is recommended. Use a level and a pencil to mark the contours of the panels on the surface.
Step 3. Cutting
To cut the panels, use a wallpaper cutter. Measure the right length and cut it off with a precise movement.
Step 4. Install the panels on the wall
Glue the panels directly onto the wall using a multi-purpose adhesive for polystyrene foam. Apply the adhesive evenly onto the surface, either in spots or all along the edge of the panel, about 2 ‐ 3 cm from the edge (the reverse side of the panel), and on the contact edges of the panel. Now press the panel gently onto the surface. Use a damp cloth to remove any excess amount of the adhesive. When placing the panels onto the wall, make sure that all the edges adhere properly to the surface. If you discover any cracks in the joints on the panels, use an acrylic filler. As an option, you can install the panels using (spax) decking spacers, not thicker than 3 mm.
Apply an acrylic filler in all cracks. Apply an acrylic filler in all cracks and use a plastic putty knife to remove any excess amount of the filler material to give the surface a uniform decorative look.
Step 5. Painting
Before painting the panels, it is best to wait for at least 24 hours to allow the adhesive acrylic filler material to dry. using commercial acrylic or latex paints for indoor use, paint the panels twice.
NOTE!
- Do not press the panels onto the wall too hard, as this may damage them.
- Use only proven, high quality paints ‐ for good coverage.
- Use an adhesive for polystyrene foam. Consider buying it from us, as we can help you choose the right adhesive for the products.
- Remember to cut the panels only with a sharp wallpaper cutter.
- After painting, use a feather duster or vacuum cleaner with a soft brush attachment to clean the panels.
Do not install the panels in busy areas. Choose surfaces away from an open flame and high temperatures (e.g. a fireplace, a gas cooker etc)
-
Beautiful Panels!
The A La Maison Wall Panels-Desert are beautiful. We used them in our family room which has wood beams. We love the new ambience! The design is so pretty. They are easy to install, and lightweight. I definitely recommend.
-
Looks great
These panels look so neat and pretty. I used them on the wall at my sink. These fit perfectly thankfully, no cutting or changing anything. All aligned together and flows so perfectly. In person, looks like little pillows. Would love to have more to do more in my kitchen. High quality and so simple to install.
-
Ceiling tile
I bought these a week ago and I will be buying more soon. They look very nice and easy to install . They brightened the room the colors are bright white and I believe they will be easy to wash down in the spring ,
-
Easy to do!
These were super easy to install and look cool. They are made of polystyrene foam and are thick which helps with sound. I still need to paint them but I like the way it looks. You can use acrylic or latex paint. I like that it comes in many different styles.
-
Exactly what I wanted
These tiles are great! I was going for a calm almost like ocean waves and this style is perfect!
I’m using them for an art piece but I love them so much so I’ll be ordering different styles to play with.
The packaging was great, every tile was in perfect condition.
It comes with instructions and foam adhesive for the tiles.
, Plain White")
, Plain White")
, Plain White")
, Plain White")
, Plain White")